Showing posts with label cheap. Show all posts

Wednesday, April 3, 2013

DIY: Make Your Own Make-Up!

This is the post that I have been anticipating for a while. I probably over did it. My husband and I like to call it, The Chipotle Effect. Basically when you or someone else talks something up so much and then you finally see/try/taste it and you're kind of like, "Eh." while shrugging your shoulders. Or if you enjoy it, but it's not nearly as awesome as everyone has said. Well, I did that to myself I think.

But don't let that deter you right away! I'm going to do more research and see what I can add/take away to make this even better. It's too awesome to not work!

All you need is:

  • French Green Clay (I bought mine at Whole Foods)
  • Corn Starch
  • Cocoa Powder (optional for color)


And all you do is mix the three together! The original tutorial says to do 1 part clay to 1 part corn starch. Basically, if you use 1 Tablespoon of clay, use 1 Tablespoon of corn starch as well. The cocoa powder is optional but I wouldn't recommend using an equal 1 part as well. Add it in slowly to ensure you get the color you want.

Here's how it went for me.


I started small, with a 1/2 tsp of corn starch.
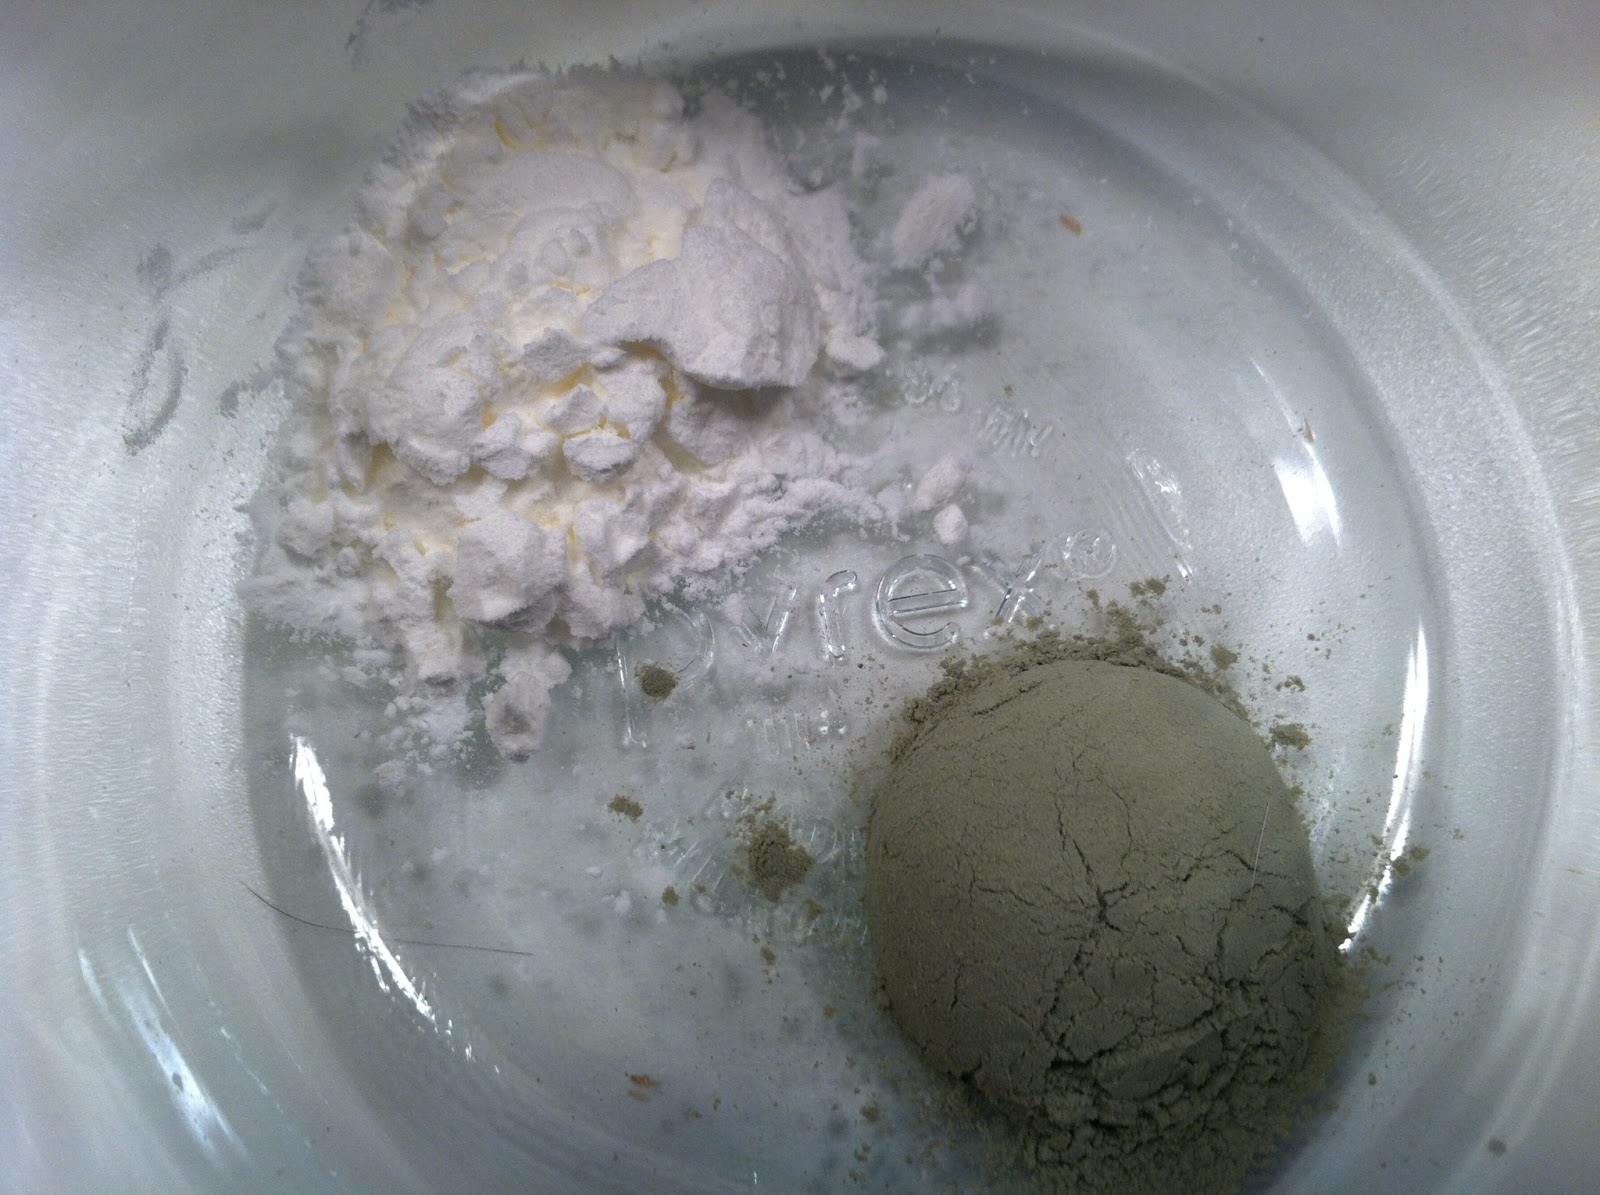

Then a 1/2 tsp of French green clay.


Then about 1/16 tsp of cocoa powder. 


 And this is what it looked like. A bit too green for me.


So I added more cocoa powder. 


Better. 


And more...


Then more corn starch to lighten it. 


Even better, but not quite. 


More of each! 


This was my final color. It's not what I was expecting but it doesn't look like that color on your face. It blends into your skin very well.


As you can see, I didn't make all that much. This old spice jar works perfectly, especially if I make more! 

Tips and hints:
  • This is more of a translucent powder than a powder foundation. 
  • French green clay is used widely for facial masks and is completely natural. It's full of important minerals for our bodies and skin. 
  • Corn starch acts as an oil absorber but it won't dry out your skin.
  • Some with sensitive skin may have reactions so be cautious if you have sensitive skin. I had no issues.
  • If you want, buy all organic ingredients. I just used what I had on hand. Even all organic you can buy the ingredients for less than $10. How many make up brands are THAT cheap??
  • Because it's a powder, you'll need to apply a moisturizer first in order for the powder to stick to your skin. I recommend using Alba Organics SPF 15 Daily Moisturizer. It's light, organic and I love it! (Not paid, just love the stuff.) 
  • One awesome benefit of this is you can simply add more cocoa powder for the summer months when you're more tan then make a lighter batch for winter! So awesome! 
  • It's gluten-free!! I know this is extremely important for many people. Before this, I didn't have any clue that make up could have gluten in it!
  • Even if it doesn't turn out right, you didn't waste hardly anything but time! French green clay is great for face masks so mix your leftovers with some water for a mini spa night. Treat yo'self! 


Conclusion: 

I haven't made one yet. I really didn't see a major difference with the make up. It also seemed to wipe off way too easily. I'm not giving up yet, though because I really want this to work. How cool would it be to make all of your own make up for pennies?? I'm glad I didn't buy the 1lb jar of green clay to start with, though! I'm going to do more research and see what I can find to improve upon this. I don't want to give it up yet! 

What's your favorite kind of make up? Do you go au-natural whenever possible? What's your best make up trick? If you've used this recipe before, any tips or tricks for me? 

Till next time,
Catherine

Tuesday, April 2, 2013

Busy bee

My newest little DIY is something I've been dying to do for a while! I finally got the final material necessary over the weekend (Hint: I found it at Whole Foods) but have been working extra shifts so I haven't really had the time to actually try it out!

I'll go ahead and spoil it for you...I'm going to attempt to make my own make up out of 3 simple ingredients!!

How cool is that?!

Well, if it works, anyhow.

My mom and sister were very skeptical when I told them but I think this is totally worth a try! I am very picky about make up even though I don't wear it often. I only use powder because liquid make up feels funky to me. But of course, the only brands I'm willing to use are expensive. Therefore, I don't buy it. If this works well, I will be saving tons of money for years to come. Plus, I know exactly what's in my make up and can feel very confident about my decision being healthy, safe, non-toxic, natural, cruelty-free, gluten-free, and so on and so forth.

I'm super excited to try this out and share it with you all tomorrow!!

Any guesses to the three ingredients? 

Till next time,
Catherine

Thursday, March 21, 2013

DIY-Make Up Brush Holder

This project is as simple as it gets. It's one of those things you see all over Pinterest and think "Oh, that's so cute! I should do that to de-clutter my make up bag!" but you never get around to it. 


Buy a vase or jar...fill it with rocks, pebbles, coffee beans, sea shells, etc. 


Now stick your make up brushes, paint brushes, pencils, pens, scissors, art supplies, etc in it! 

The possibilities are endless with it too. You can use any kind of jar or vase that works with what you're putting in it and then use any kind of filler you want. Heck, you could get a large vase, fill it with dried pinto beans and stick your kitchen utensils in it! How cute would that be? Or maybe even colorful dried heirloom corn?

How about filling it with beads and sticking craft scissors in it! Or even for a child's play room, fill it with marbles and stick their markers in it! So many choices!

What combo would you do? What area of your house would it help to organize?

P.S. I may not get around to posting anything tomorrow as my husband and I will be celebrating our 1 year anniversary on a weekend trip!! So excited!!

Till next time,
Catherine

Wednesday, March 20, 2013

Pinterest Failure-Elmer's Glue As a Blackhead Remover

Ok so I'm sure most of you have seen this graphic online either on Reddit or Pinterest or somewhere else.


Well it looks like it's tried and true...it MUST work!

Not.

I was so excited when I saw that picture because I figured, here they tested it and showed picture by picture. I thought it had to be worth a try. What do I have to lose...a few minutes with glue on my nose and potentially some blackheads? Can't hurt.

Let me tell you...it doesn't work. Let me rephrase that...it didn't work for me! I'll spare you any awkward and up close nose shots but my nose didn't look different at all when I was done. I can understand the concept behind it but it definitely didn't do a thing for me.

So, Mr. Reddit Character...moral of the store is still the same, but not everything is as it appears!

What's your best blackhead removing secret? Is it an expensive product or homemade remedy?

Till next time,
Catherine

Monday, March 18, 2013

Scary Roads and Weekend Fun

I don't know how it is where you're from but here in Lynchburg it is COLD and WET! Yuck! Areas near Richmond got snow but we just got rain and ice.

On our way home from Richmond last night it began to rain a little, but nothing bad. The temperature was above freezing so we cruised as usual. All of a sudden, maybe 20 minutes from home, we saw about 6-7 sets of tail-lights going every which way on either side of the road. There was one car in front of us and they began to hit the brakes and fortunately we *carefully* followed suit. Just in the nick of time because we began to slide back and forth a bit but we were able to slow down safely without ending up like the other cars. It was a panicked 15 seconds for sure!

The odd part was that it was only that small few hundred foot section of road that was iced over but nowhere else was. I'm just so thankful we saw it in time! One car was facing down into a ditch but up on a hill on the other side so they were facing the road! No idea how they managed that but I hope everyone is OK!

Other than that we had a wonderful visit in Richmond. We got to spend time with family, including my precious niece and see some friends too. It didn't work out for me to have a girl's night like I had planned but that's ok...we'll be back soon and we can hopefully do it then!

My husband and his friends even made a bow out of PVC (for about $10) from this tutorial video I found! Man oh man did they have fun doing that! Unfortunately they didn't get pictures for a tutorial but the'll be making more and next time I'll be sure they get pictures! Maybe even a video too! So be on the lookout for that!

As for today, it's a snuggle under the covers and watch a movie kind of day! It's too cold for anything else!

How was your weekend? Are you as ready for spring as I am? 

Till next time,
Catherine

Thursday, March 7, 2013

DIY-Index Card Calender

If you're like me, you like to have an organized schedule and write down everything! Since middle school, my planner has been a place to write down homework, to-do's, and what happened that day. Sometimes it will be boring things like, "Stayed home and watched a movie," but other times it will be, "Went on a haunted hay ride with Billy, Sally, Suzie, and Tommy. Tommy was his usual crazy self and jumped off the wagon and ended up breaking his leg! The rest of the night was filled with a trip to the hospital and angry parents." Both of those are fictional stories, by the way. 

My point being, I like to write things down! I think it's fun to look back in time and see that "It was 85 degrees outside today in February and we had snow two days ago!" I just think that's really neat. I think I got this from my grandpa on my dad's side. He used to write little notes on the calendar or just stick them on the fridge. One of my favorite ones says, "Found mouse in dog food today" and then the date. It makes me smile to think of him writing these little notes and knowing I do it too. My dad has been doing it more over the years too. 

With this little project, I can look at multiple years at once which is really cool. I don't have to flip back and forth through different planners to find the right date. I originally found this on Pinterest of course. The original project can be found HERE but I just did my own version from the main picture. I adore these little farmer's market strawberry baskets and knew I saved them for a reason!

What you'll need:
  • Markers or pens in the colors you want
  • 366 lined index cards (Don't forget leap year!)
  • Scissors
  • Strawberry/fruit farm basket


Directions:

If your basket is a cardboard type one you're good to go. Mine was a clear plastic so I spray painted it this pretty green. 

Measure the width of the basket against an index card then cut them down to size so they fit properly. I cut maybe an inch or so off of mine. If you have a paper cutter this step will go quickly.

Now the time consuming part of the project is writing the month and day on each card. I tried to use a different color that sort of pertained to the month (red for February, yellow for April, green for December, etc.) but you can do it however you'd like. 

Stick the cards in the basket and toss a pen in the front. Now every day go write a quick line of what happened. 

I did this project late spring of 2012 so I grabbed my planner and filled in the cards from January 1st until the present day. January 1st was fun because it was the day we moved Brian (my husband) into our townhouse. 

Some days I forget and I have to fill in a week at a time and all too often there's nothing "exciting" to write. That's ok though because it will be fun to look back and see that on a specific day all we did was snuggle, watch movies and eat pizza. I've written other entries such as, "Tried Vinny's for dinner finally-really good!" or "Explored Peaks View Park" or "Started a blog!" or "About 4" of snow!" You can write whatever you want to remember about that day. I'm now into the second year with the index cards and I can hardly wait to look back at them 10 years from now! 

Do you like to write in a journal or planner as a memory keepsake? How do you record your life?

Till next time,
Catherine

Friday, February 22, 2013

DIY: Greeting Card Binder

OK are you prepared for this?

Gather your sweet and lovely cards from your wedding, your baby shower, past birthdays, whatever you want.

Dust off your hole puncher.

Buy binder clips from Target (about $3 for an assorted pack of 8) in the office supply section.

Now get to work. 


I don't really need to give a tutorial for this do I? 

What a "Duh!" moment on how easy this is and what a great solution for all those cards you can't toss! I did this with all the cards from my bridal shower and wedding. I also cut cardboard to fit in the front and back as covers but haven't gotten around to doing anything cute with them. Maybe I'll glue some cute scrapbooking paper over it or even Mod Podge some pretty fabric. 

Another cool aspect of this project is that you can always unclip the rings and add more cards as time goes on! 

What would you do to make it look cute and decorative?

Till next time,
Catherine


Thursday, February 21, 2013

DIY: Laundry Detergent!


Back when I first got an account on Pinterest, I pinned this recipe for making homemade laundry detergent  from Being Creative to Keep My Sanity for a fraction of the price of buying it from the store every month. I made this quite a while ago and also recently made dishwasher detergent! I love this because it's cheap, easy, lasts forever, and I actually know what's in my detergent, not just random chemicals! 

Ingredients: 
  • 1 4lb 12oz box of Borax (found in the detergent isle)
  • 1 4lb box of Arm & Hammer Baking Soda (found in the baking isle)
  • 1 3lb 7oz box of Arm & Hammer Super Washing Soda (found in the detergent isle)
  • 3 bars of Octagon soap OR 2 bars of Zote soap  OR 3 bars of Fels-Naptha soap (all found in the detergent isle)
  • 3 lb container of Oxy Clean 

You'll also need:
  • A large bucket, such as a 5 gallon one
  • Large trash bag or multiple plastic grocery bags
  • Large spoon to mix with
  • Cheese grater

All you need is 1-2 Tablespoons per load! Save your Oxy Clean scoop and measure it that way, which is what I do! It doesn't sound like much but it's all you need, trust me! 


Directions: 

Grate the bar soap in your cheese grater. I used the regular size holes. Actually, I put my husband to work for this step ;-) It will dissolve in the water, so no worries! I only wash laundry in cold water and I've never had a problem with it not dissolving. 

Now dump everything into the trash bag-lined bucket and mix! I tried to pour each ingredient in layers so it was easier to mix. 

Do I pick the easy projects or what?


My absolutely adorable jar I found at a local thrift store for about $5! I had been wanting to do this project for ages but hadn't found the right jar for it yet. I was ecstatic when I did! It's a little cracked and definitely not perfect but I think it adds to the charm!  


And here it is, all done and ready to go! I had a grocery bag FULL of extra but this was all that would fit into the jar. The little fabric bits are dryer sheets I made with flax seed and dried lavender! They smell amazing and save tons of money also. Keep reading for why I decided to make my own! 


I took this screen shot while I was watching the show My Strange Addiction about a lady who ate dryer sheets. So weird! What's worse is that the chemicals in dryer sheets have been proven to cause cancer and nervous system disorders! Why on earth would I want to put that on my clothing and linens? No thanks! Did you know that many brands of dryer sheets also contain animal fat? Heads up, vegan friends! Now you understand why I either use my own or don't use any at all! 


 Here are a couple more shots of the jar I gave as part of a bridal shower gift to a sweet friend. My husband designed the label for me...what a good graphic designer husband! I had him put the ingredients on the label so if she wanted to make more she had the recipe right there!


On the other side I listed Directions to Use and then Directions to Make. At the bottom I put a little note  saying congratulations, etc. 

What a simple gift, right? I combined this with a homemade flax seed/lavender dryer sheet and a laundry basket from her registry. I think I added more laundry related items but now for the life of me I can't remember! 

I've also given several jar-fulls to my mom and my mother-in-law and guess what...I've still got tons left! I don't remember exactly when I made it but it's getting close to the year mark I think. This stuff is great! 


Helpful hints:
  • I had a hard time finding Super Washing Soda. My local Food Lion, Target and CVS didn't have it but Kroger did. 
  • My local Food Lion didn't have Fels-Naptha soap or Zote so I bought Octagon brand. They're all basically the same. Zote can be found at Home Depot.
  • The Oxy Clean is optional but definitely can't hurt, especially if you have kids or work a messy job!
  • Remember, you only need 1-2 Tablespoons per load! This stuff will last you FOREVER! 
  • The recipe makes about 2 gallons so be prepared! 


Have you ever made your own detergent? What's your favorite detergent to use?

Don't forget to go HERE and enter my very first giveaway!! It's an amazing prize!

Till next time,
Catherine

Wednesday, February 13, 2013

DIY: Memory Keepsake Shadow Box

Ready for a super easy DIY project? 

Are you sure? It's really easy.

If you're like me, you like to save little things like movie ticket stubs, exhibit passes, concert tickets, fortune cookies and other little momentos of dates and special times with your significant other or friends. I always try to keep them in the same general place, like a giant plastic bin full of other memory items. 

So, if you've got 'em, gather 'em up.

Now buy a shadow box. The size is up to you. The one I bought is maybe a 5"x7" but don't quote me on that. 

Open up the shadow box, toss in the little treasures. Close it up. 

You're done! 

If you want to get all fancy schmancy with it you can cut a slit in the top so you can just drop in new ticket stubs as you get them. 

You can also cut a cute piece of scrapbooking paper to fit and be the background.

I didn't do either of those but I'm keeping them in consideration! 


I've always liked to save little things like that but never had a way to display them. I love this because it's so simple and it's so sweet to be reminded of these fun memories.

Do you save little things like that? What do you do with yours?

Till next time,
Catherine


Thursday, February 7, 2013

DIY: Dish Detergent!

Are you tired of spending way too much money on dishwasher detergent/tabs/liquid? Fortunately for me, just before I got married and my husband was living the final bachelor days in our townhouse, I found a big box of 85 dishwasher tabs for about $12. We only just now ran out so it lasted us about a year, which is great! I found this great recipe on Being Creative to Keep My Sanity on Pinterest and it was actually one of the first things I had pinned on my DIY pinboard. I wanted to wait till we ran out of our existing tabs before making more dishwasher detergent. 

Today was that day! Well, it was a few days ago but I knew it could wait. Even better, my awesome husband hand washed all the dishes that had piled up last night! Gave me some extra time which was great because I was having a hard time finding the Arm & Hammer Super Washing Soda. Note: I couldn't find it at Food Lion, CVS, or even Target but they had it at Kroger. 

All you need is: 
  • 1 box of Borax (4lb 12oz - Found in the detergent isle)
  • 1 box of Arm & Hammer Super Washing Soda (3lb 7oz - Found in the detergent isle) 
  • 0.5lb/24 Tbs citric acid (Found in the canning isle but I got mine at a local farm Auburnlea Farm)
  • 3 cups Epsom Salt (Found in the health isle near hydrogen peroxide and such)
  • LemiShine Rinse Aid or Distilled White Vinegar (Especially important if you get hard water spots)


Directions: 

Are you ready for how easy this is?


Mix everything together in a huge bowl. Or even a big bucket. My bowl was just barely big enough. 


Now pour it into your jar/container. I saved this Oxi-Clean container and the dishwasher tab container from before. Everything fit into these two containers and I counted about 16 cups of detergent. And get this...all you need is 1 Tablespoon per load!! Can you imagine how long this will last? My guess is a VERY long time. For my husband and I, we run a load of dishes at least once a week but sometimes twice so this should last us forever!

If you have a problem with hard water you'll definitely want to use the rinse aid, whether it's vinegar or LemiShine. With either one, just sprinkle a little bit in the bottom of the dishwasher before running it. Don't worry, your dishes won't smell like vinegar! 

Price breakdown:

Borax                 $4.80
Washing Soda    $3.29
Citric Acid         $2.65
Epsom Salt         $3.00 (Estimate)
Vinegar              $2.35

Total:                 $16.09

Now that comes to 256 Tablespoons in 16 cups...that's a lot of dishes!!

If you buy LemiShine instead of Vinegar, it's about $4 for a small container. Not sure how long it lasts.

Verdict: Well, not sure yet! I just made it today so I haven't had a chance to use it yet but I will update as soon as I do! I'll do one load without the vinegar as a rinse aid and one with it so I can let you all know how it does.

Oh and here's a fun story for you all. Last week I used a sample detergent that I had. I just assumed it was dishwashER liquid...until the next morning when we got up. My husband was the first one into the kitchen and he called to me to let me know our kitchen floor was FULL of suds. Uh oh. Ok so it wasn't that bad, just a quick clean up with some towels. But, moral of the story...read the label. I felt like such a dummy but it helped us start the day with a good laugh!

UPDATE: I have since washed dishes several times and have not used LemiShine or vinegar as a rinse aid and I haven't gotten any spots on my glassware. I guess we don't have hard water! Just keep in mind if you do have hard water you'll need a rinse aid. Otherwise, the dishes are coming out sparking clean! 

How much do you spend on dishwasher detergent every month? It adds up quick! Or do you wash all your dishes by hand?

Till next time,
Catherine

Friday, January 11, 2013

DIY: From Carboard Tube to Cute Gift Box!

From this:
(via)

To this: 

It is super easy and cute! Wanna know the best part? It's free! I say free assuming that even the most beginner crafters like myself have various ribbon and pieces of scrapbook paper lying around. Families throw hundreds of these away every year! Why not save a few and make something useful out of them? Not to mention, when birthdays and Christmas come around, you're always looking for a small box for the little gifts like jewelry and money! I got the original idea from the blog Sweet Charli. 

Gather your supplies:
  • Clean cardboard tubes
  • Ribbon
  • Twine or pretty string
  • Scrapbook paper
  • Hot glue gun/glue or tape
  • Scissors
  • Tissue paper

 Directions:


Fold one end of your cardboard tube in. Think like you're trying to close one of those paper coin rolls from the bank. 


Fold in the other half. Secure it down with hot glue or tape. When you've got that locked down, wrap your gift in a small amount of tissue paper and stick it inside. Fold and secure the open end of the tube the same way as the first one. 


Now decorate them however you wish! I used an extra piece of scrapbooking paper from another project  and wrapped it around, securing it with hot glue. I also used a small length of ribbon my husband had saved from a gift he received. The man knows me. 


For this one I used a thicker piece of the same scrapbook paper and different ribbon. I just switched the directions of the ribbon and paper from the previous box. If you don't want it to be as obvious that it's a cardboard tube, just wrap the whole thing in scrapbook paper. Chances are people won't even notice! Generally people are more focused on what's inside! 

I love this idea because the possibilities of design and decoration are endless! You can even bust out that Bedazzler you've been dying to use! ;-) 


Are you the crazy one in the family who snatches up all the empty gift bags and tissue paper after Christmas? I know I am! No sense in throwing away good bags and tissue paper that can be reused! What are some other unique ways that you like to wrap gifts?

Till next time,
Catherine